Lateral Wall Movement: Bowing, Tipping and Shearing
This article is for general educational purposes only and is not engineering advice for any specific property. Reading it does not create an engineer–client relationship with VM Engineering. Foundation and structural conditions vary. Have a licensed professional engineer inspect your property before making repair, purchase, or legal decisions. Full disclaimer
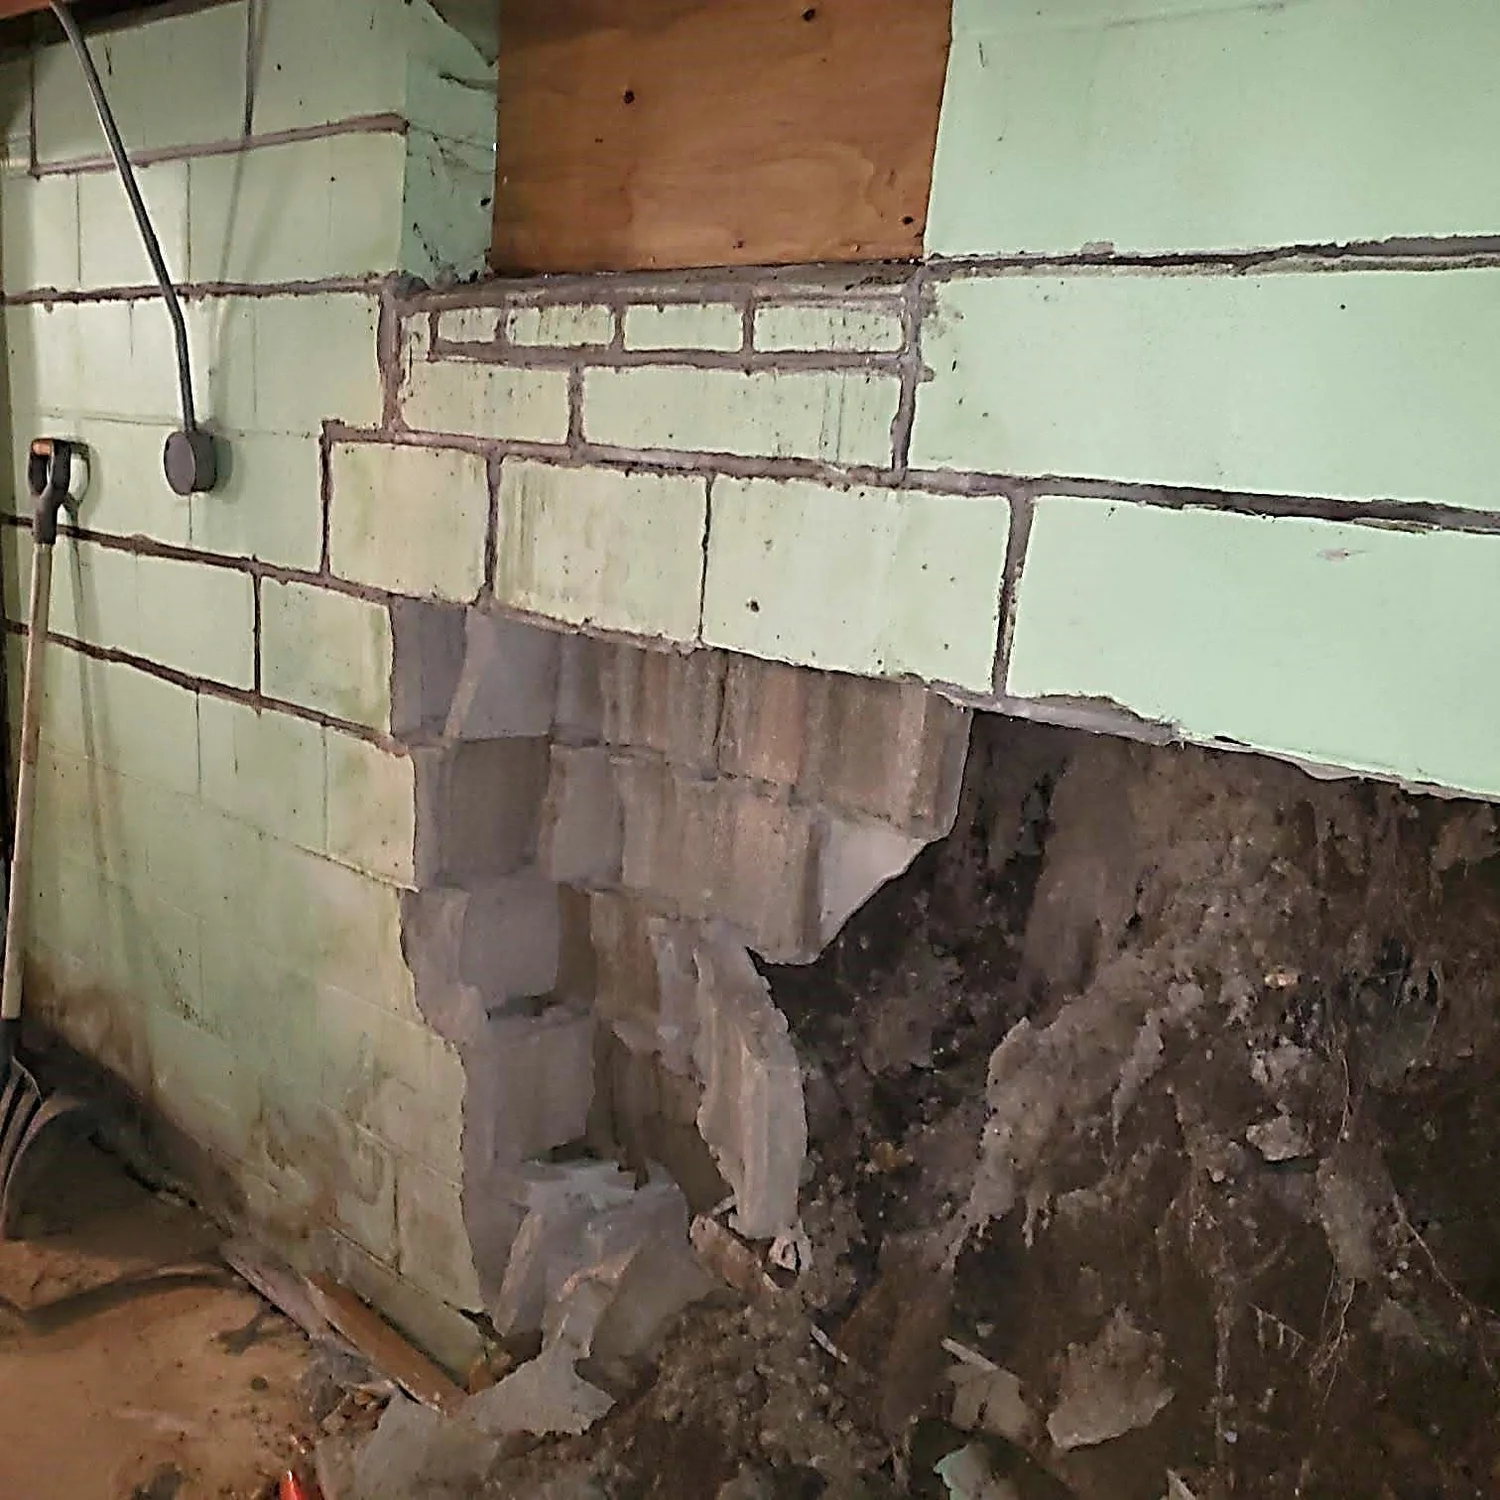
Lateral movement is one of the most common issues in Wisconsin basements, and it is where most of the judgment lives. A block wall pushed by soil moves inward in three ways. They look similar in a dark basement and they are not the same defect — the crack pattern, the course it lands on, and where the maximum deflection sits tell them apart.
The three modes
Three Ways a Block Wall Moves
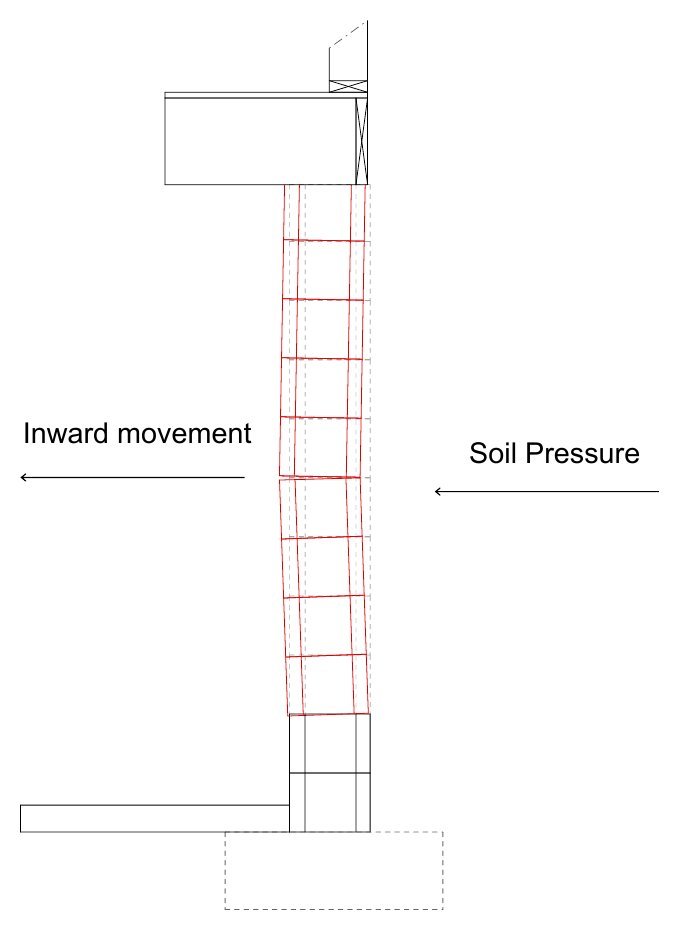
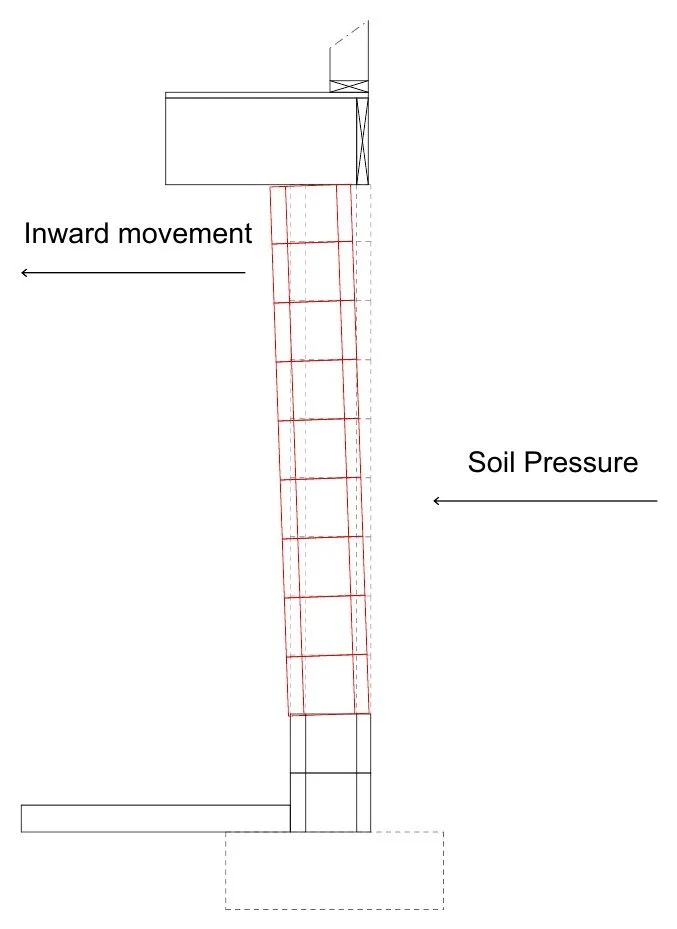
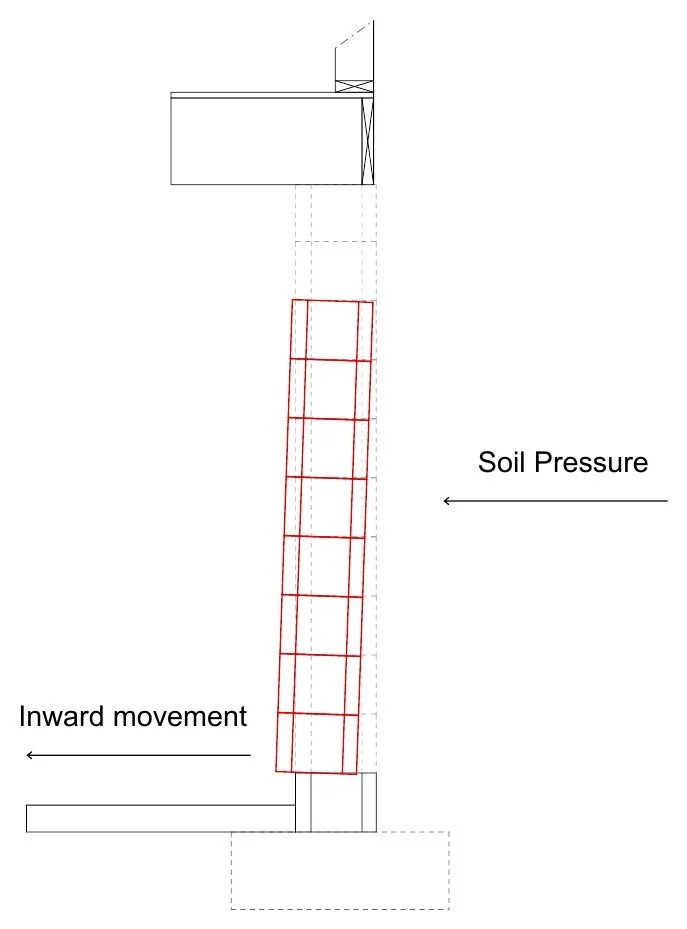
The quickest way to sort them in the field is to ask where the wall has moved the most. Maximum at mid-height is bowing. Maximum at the top is tipping. A discrete step at one joint with plumb wall above and below is shear.
Mode 1
Tipping — The Whole Wall Rotates Inward
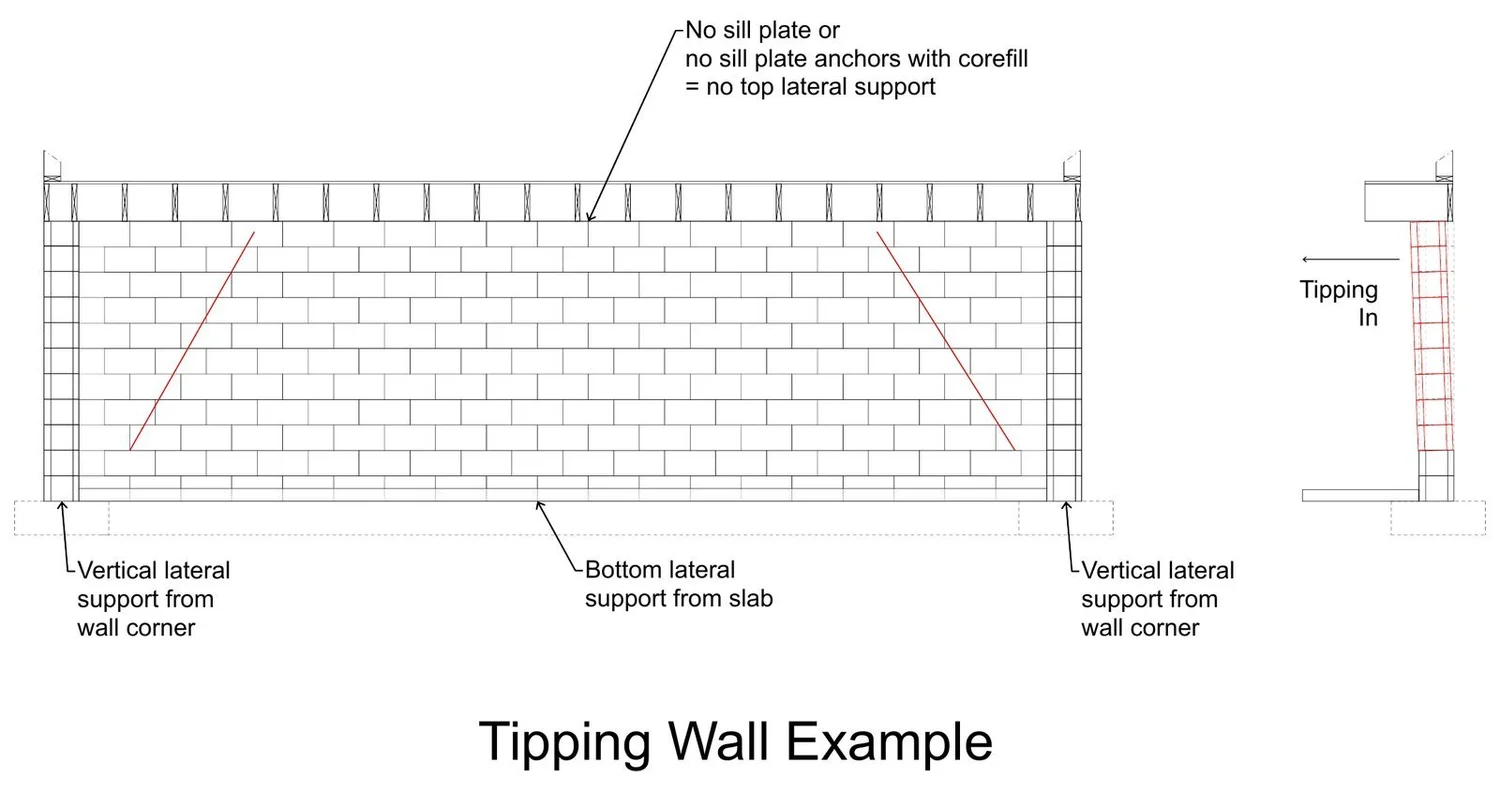
Tipping is a top-support problem. If nothing is holding the top of the wall — no sill plate, no anchors, joists running parallel with no blocking — the wall has nothing to rotate against, and it leans.
- Top of the wall in; bottom course still on the footing
- Diagonal cracks running from the corners
- Sill plate: is there one, and is it anchored?
- Beam pocket and window cracks
Reading it
Signs of Current or Recent Movement
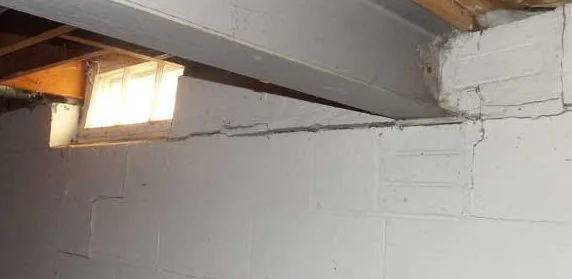
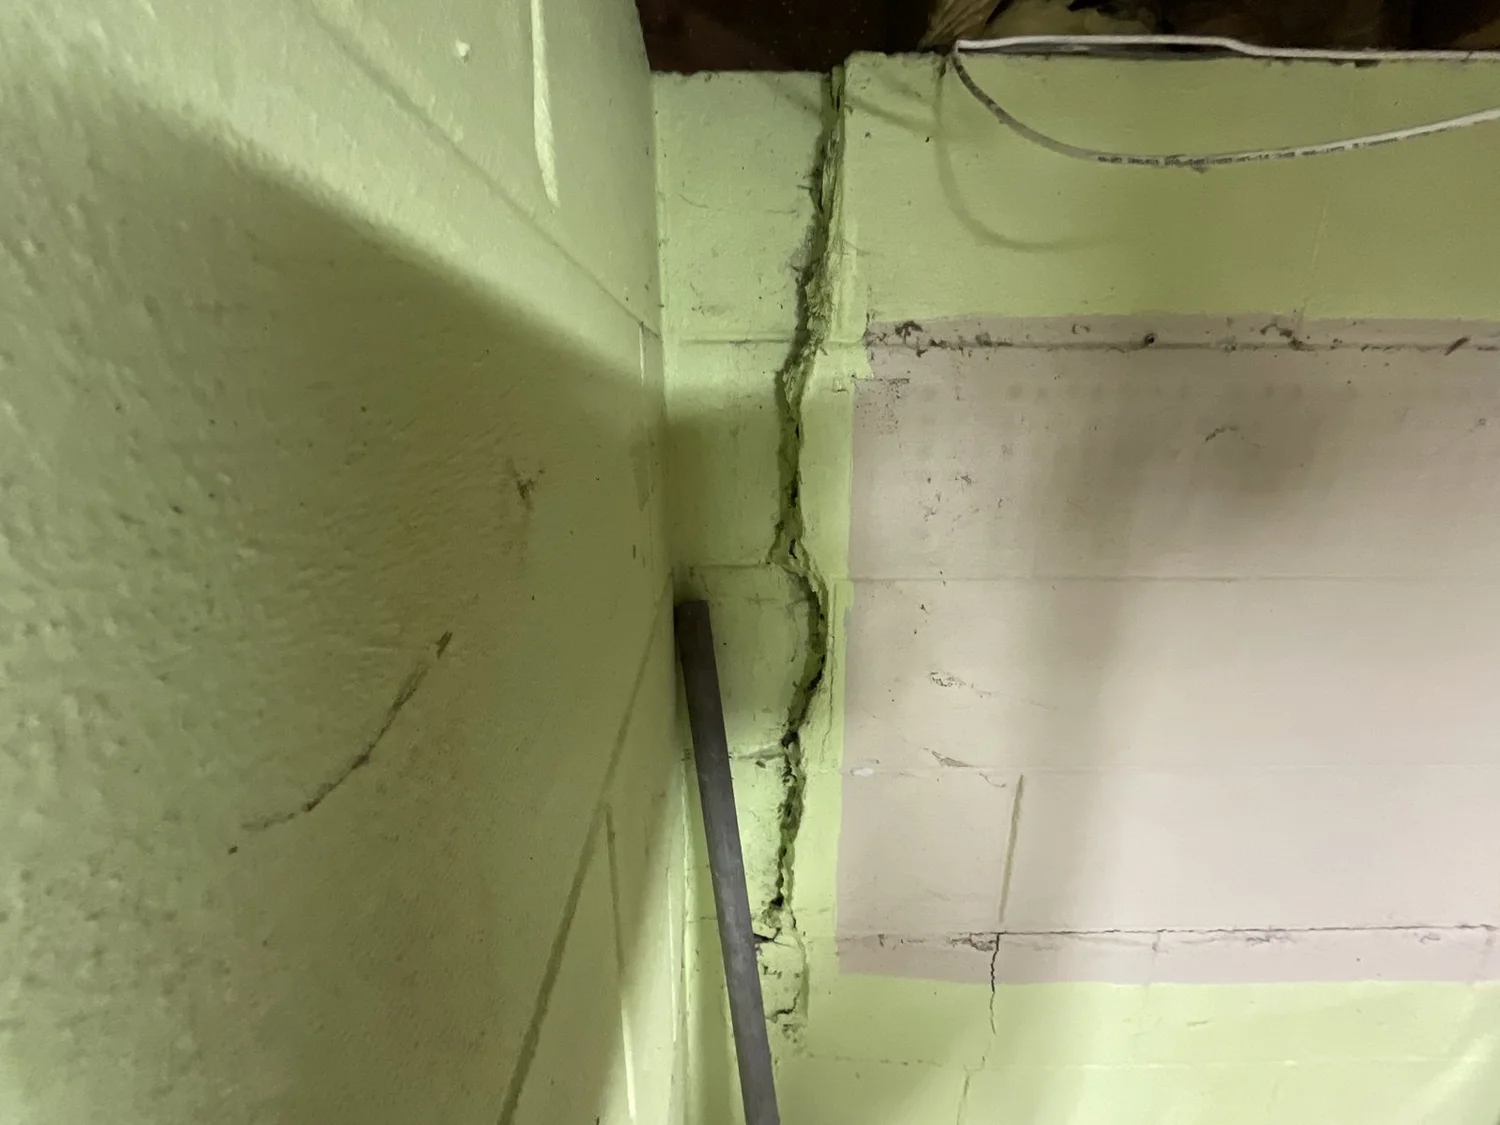
- Cracks or splits in the mortar joints or in the block face
- Cracks around the beam pocket, inside or outside
- Tipped or cracked basement windows; frames racked
- Interior framed walls perpendicular to the foundation bowed, or with damaged finishes
- Veneer or siding above the wall out of plane
- A gap opening between the sill plate and the top of the wall
Mode 2
Bowing — The Wall Curves Inward at Mid-Height
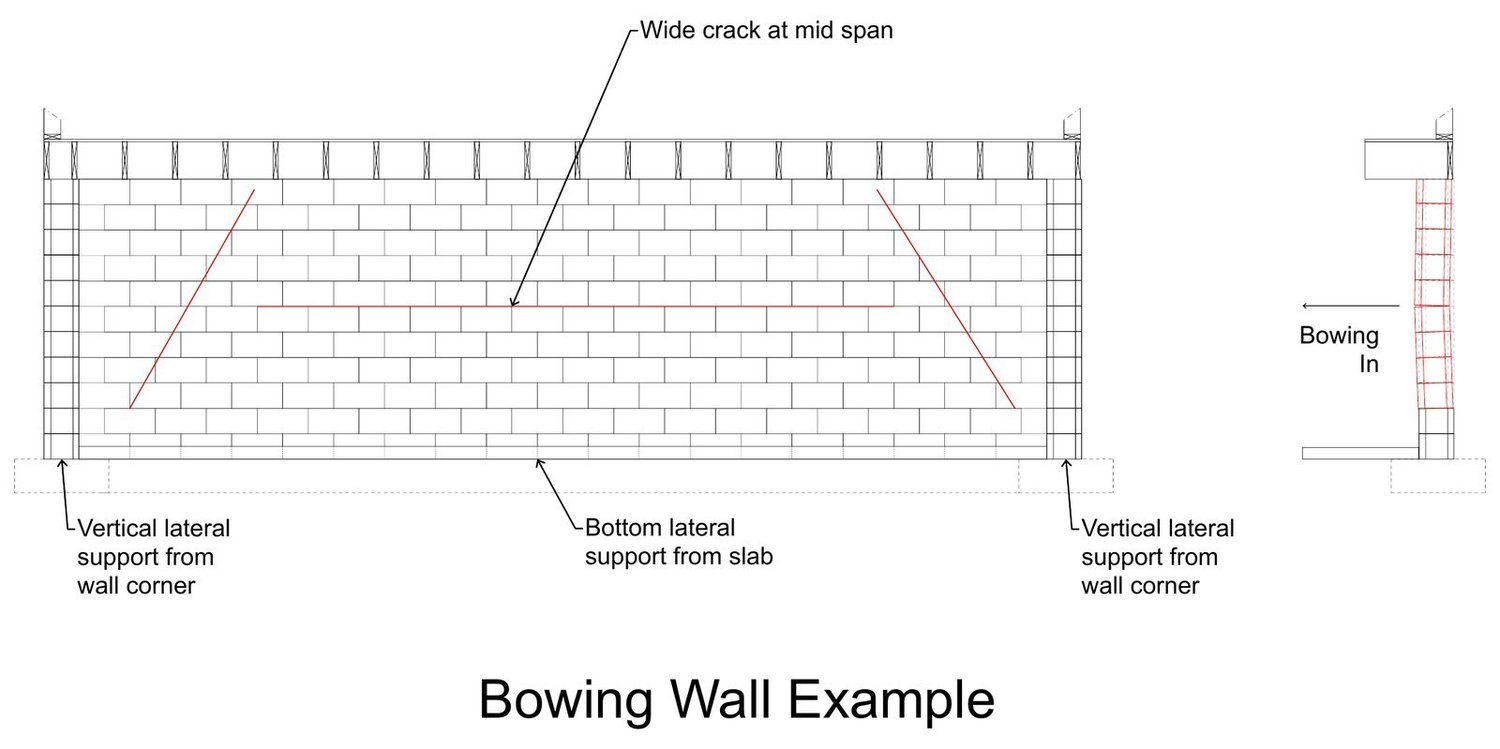
A bowing wall is supported at the corners and at the slab, so it spans between them and fails in the middle, exactly like an over-loaded beam. The horizontal crack lands at the point of maximum bow — often the third to fifth course.
- A wide horizontal crack at mid-height, mid-span
- Diagonal cracks running down toward each corner
- Maximum bow at the center of the wall
- Corners and bottom course still in place
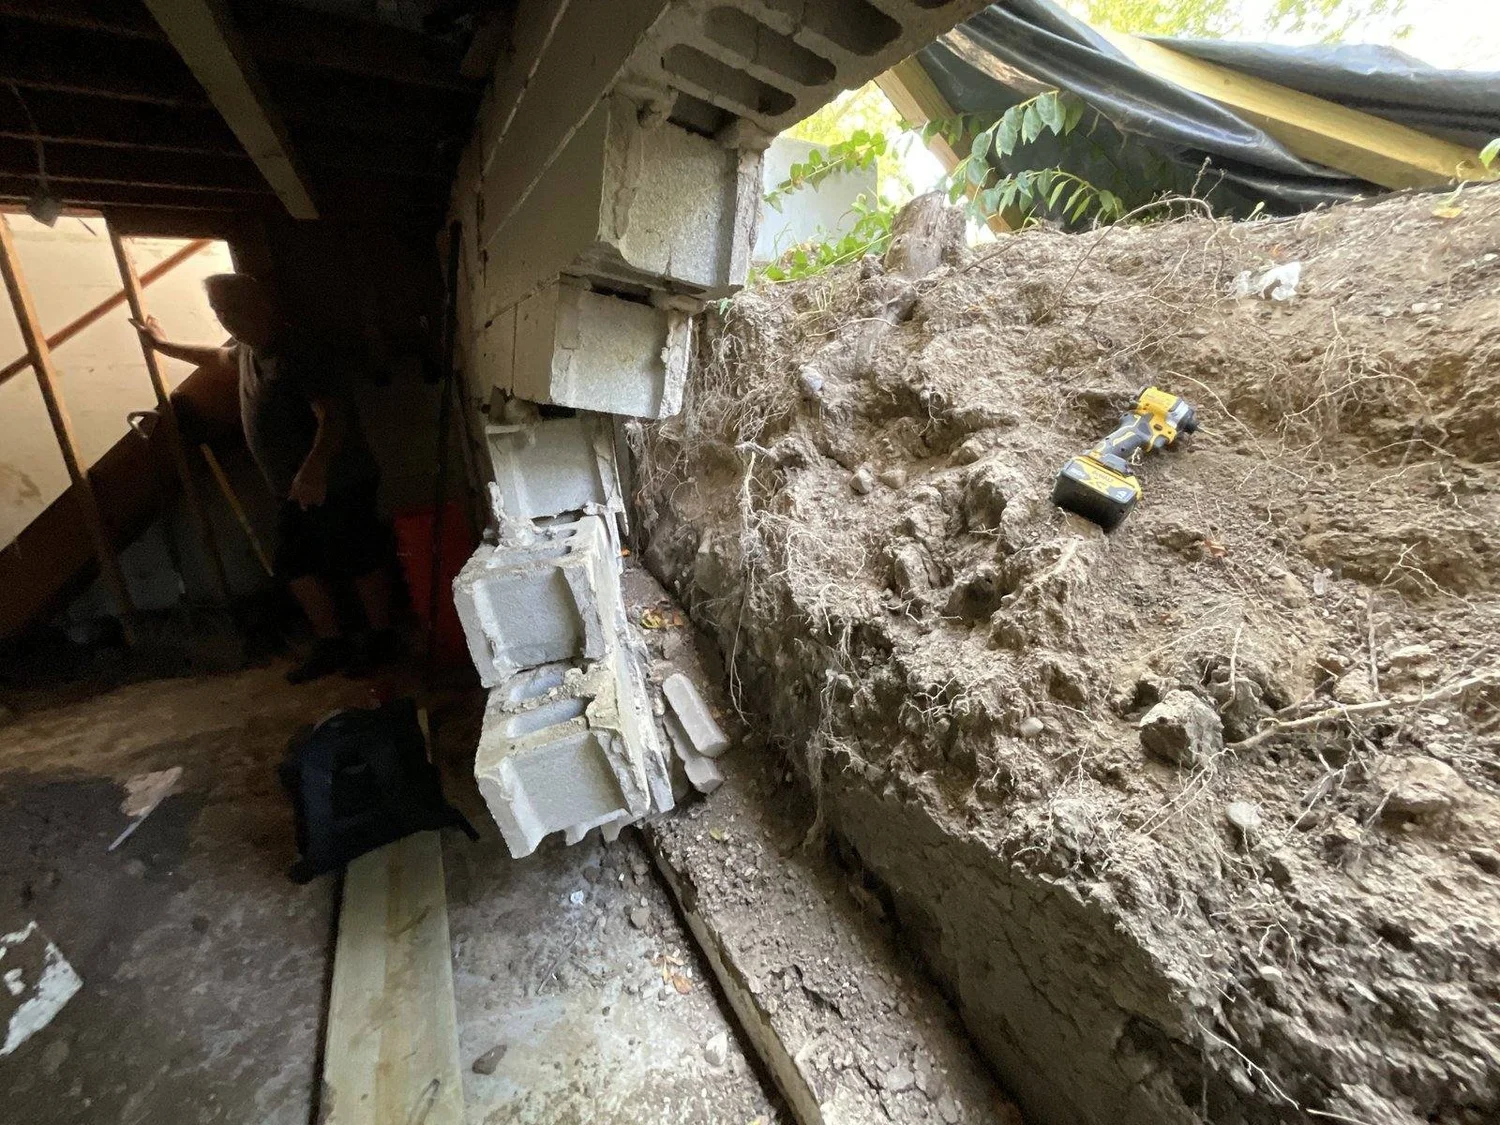
The horizontal crack — six questions
When you find a horizontal crack, the course it is on is the first thing to record, because it separates bowing from shear.
- Which course? Mid-height means bowing; the 2nd course means suspect shear
- Does the crack run the full wall, or stop at an irregularity?
- Width — hairline, under ¼ in., or over ¼ in.?
- Fresh clean edges, versus dirty, painted, or previously tuckpointed
- Matching step cracks at the ends of the wall
- Measure the bow at the crack height: center of wall versus corners
Mode 3
Base Shear — The Wall Is Sliding Off Its Bottom Course
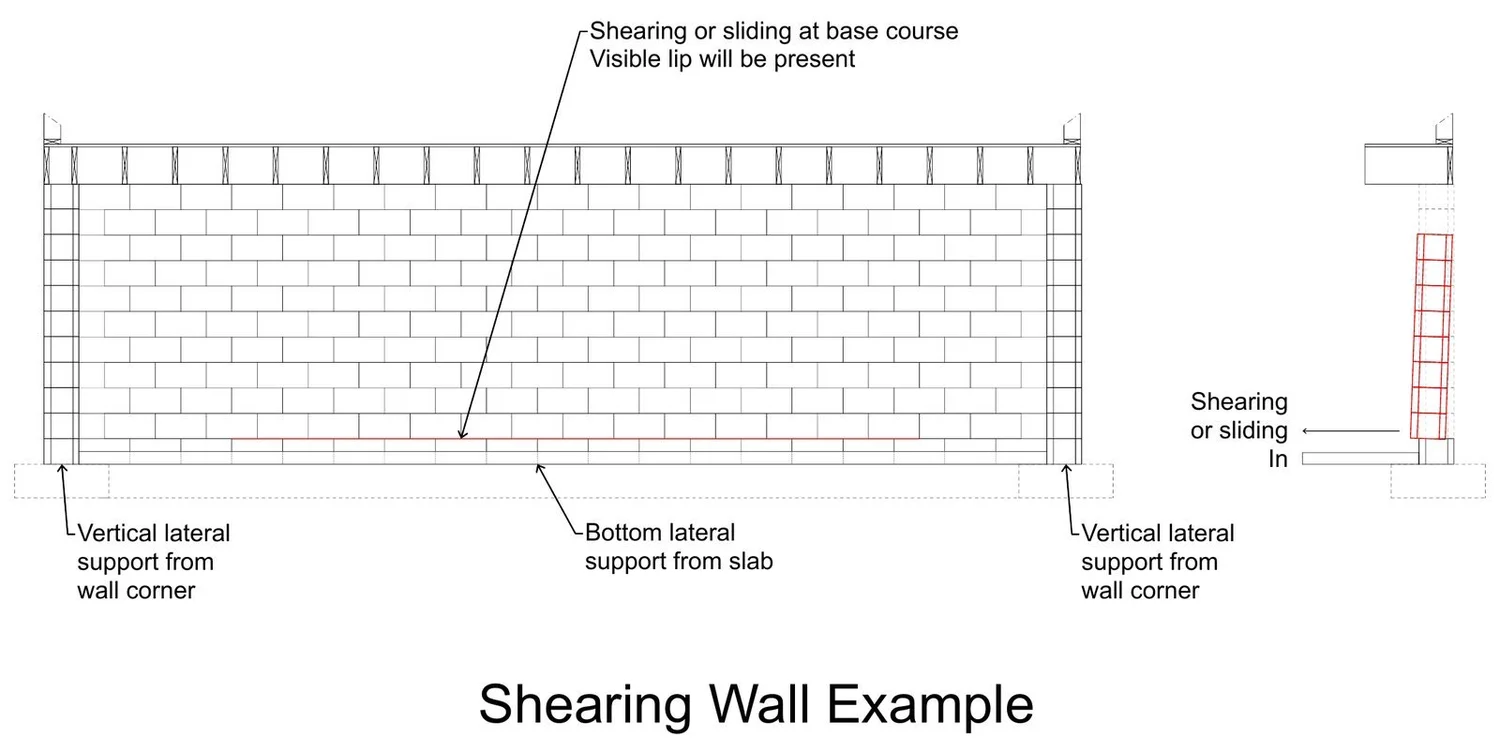
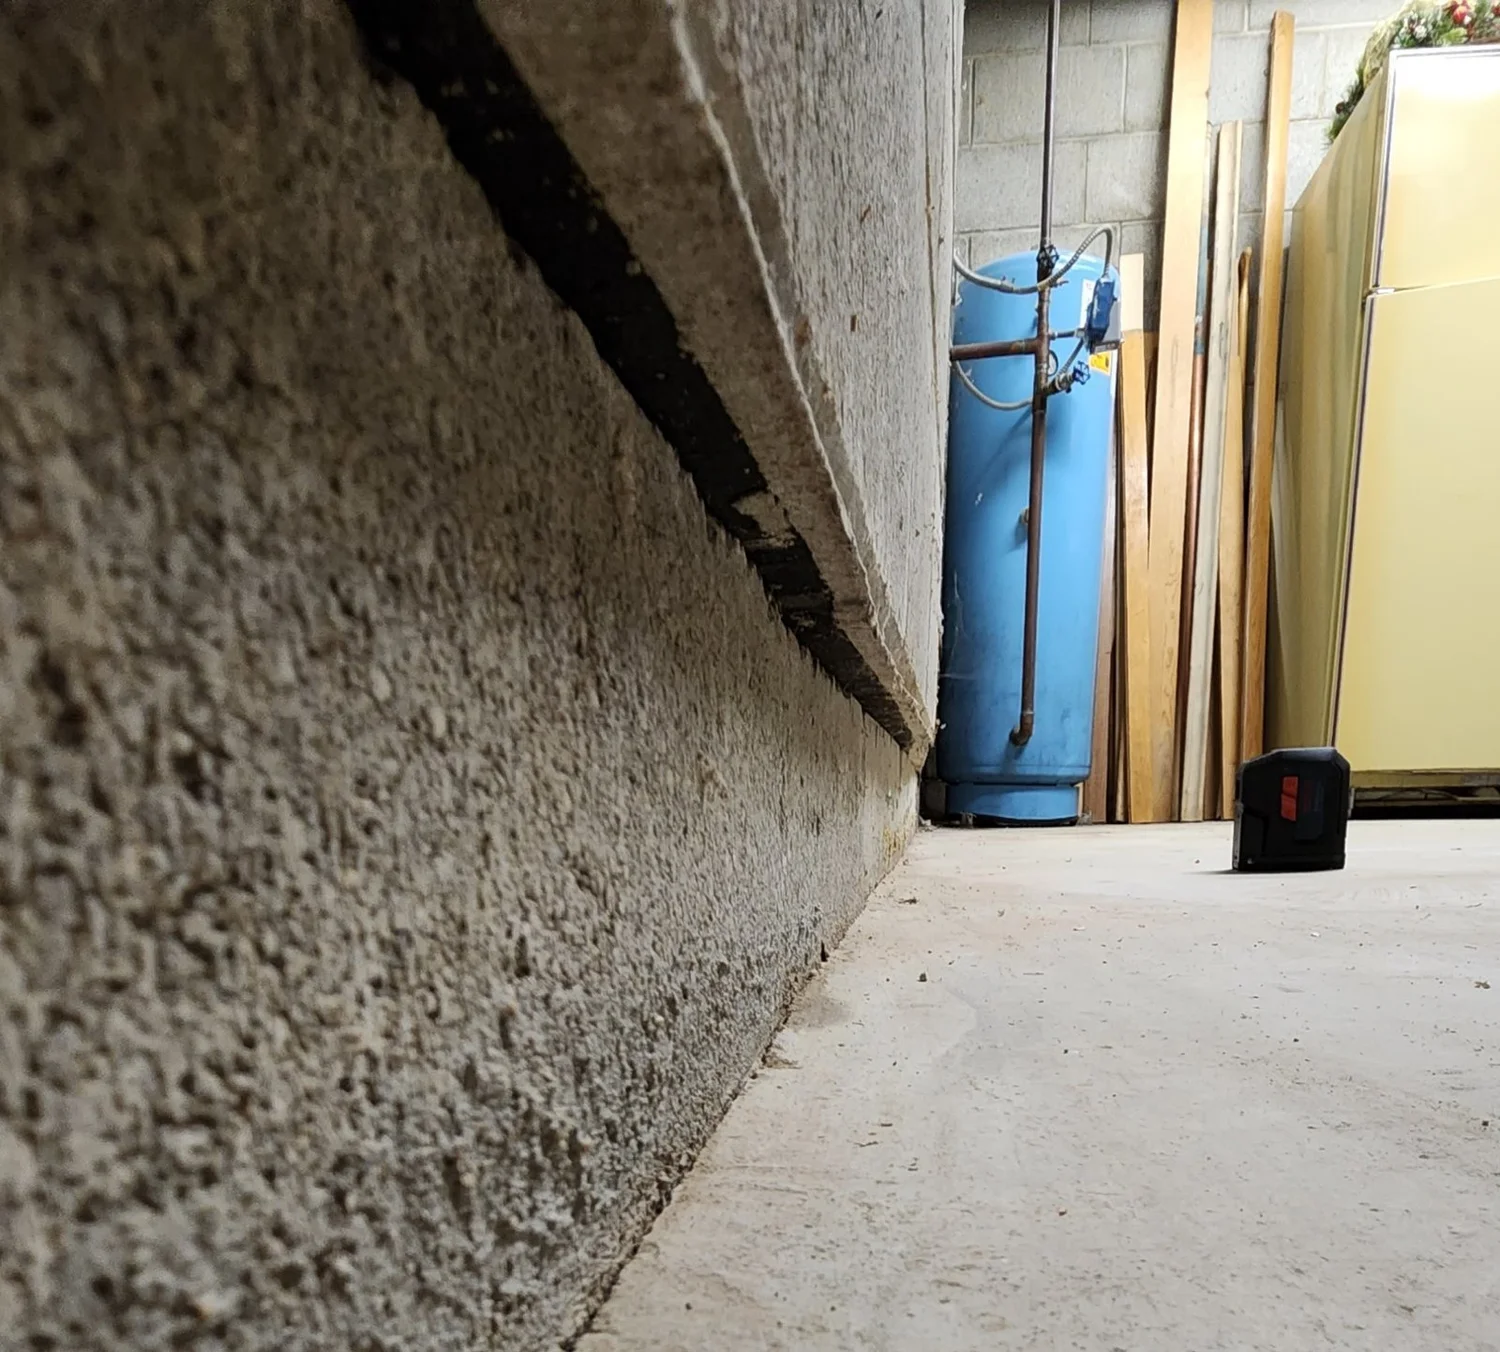
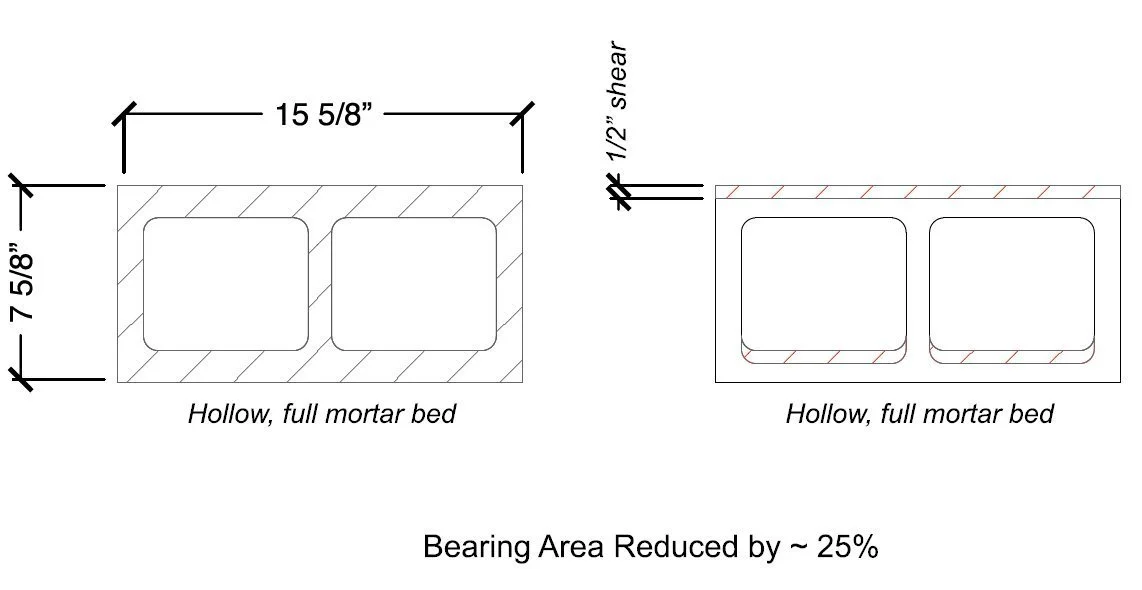
Shear is the one that gets missed. The wall above the joint stays plumb, so a flashlight held at chest height shows a wall that looks fine. The defect is a ledge at ankle height, behind the storage shelf.
- A ledge or lip you can feel at the 1st or 2nd course, sometimes higher
- A continuous horizontal crack at that joint, often with seepage, running nearly the full wall length
- The amount of offset — under ½ in., or ½ in. and more
- Any broken, crushed, or spalled block face below the slide
- Check the corners: shear usually stops short of the corner, so the corner block cracks vertically
Get low and sight along the wall with a flashlight. Shear is easy to miss behind stored items and finished walls, and any amount of it is a referral to a foundation contractor, consultant, or licensed engineer.
When it has gone further
Block Face Failure — Report It in Plain Words
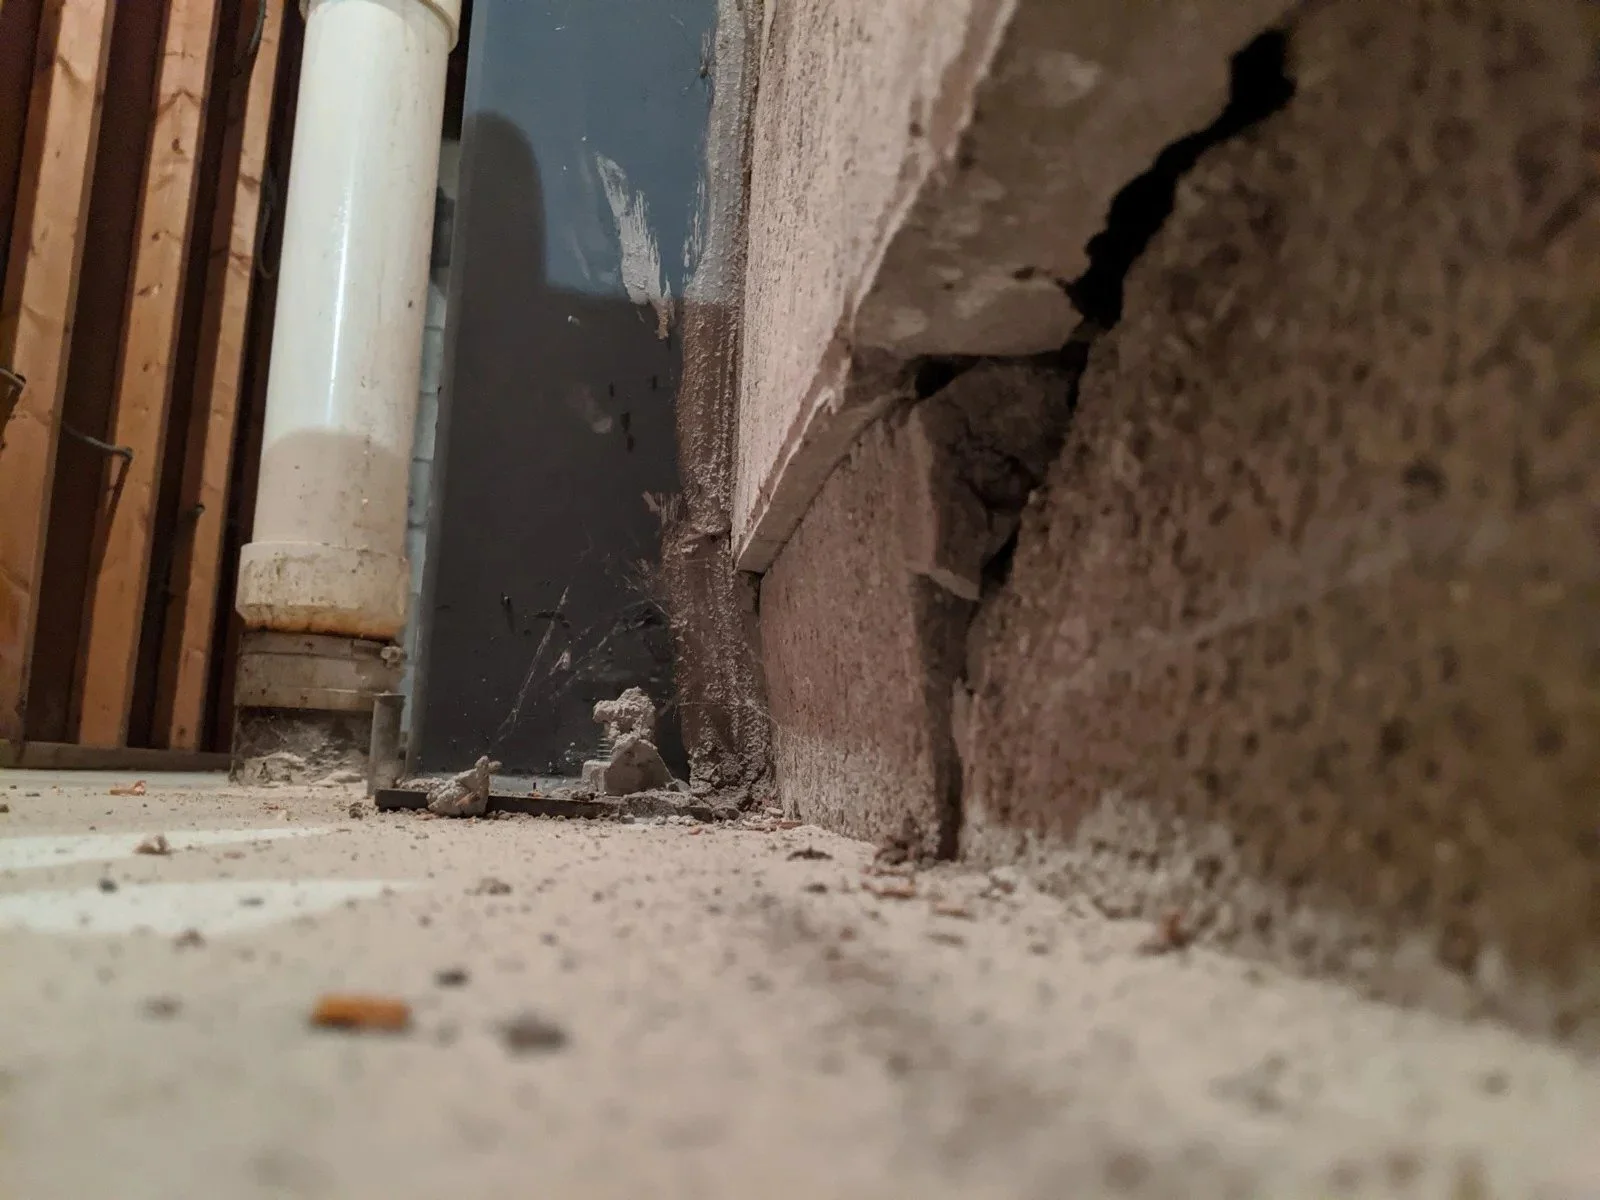
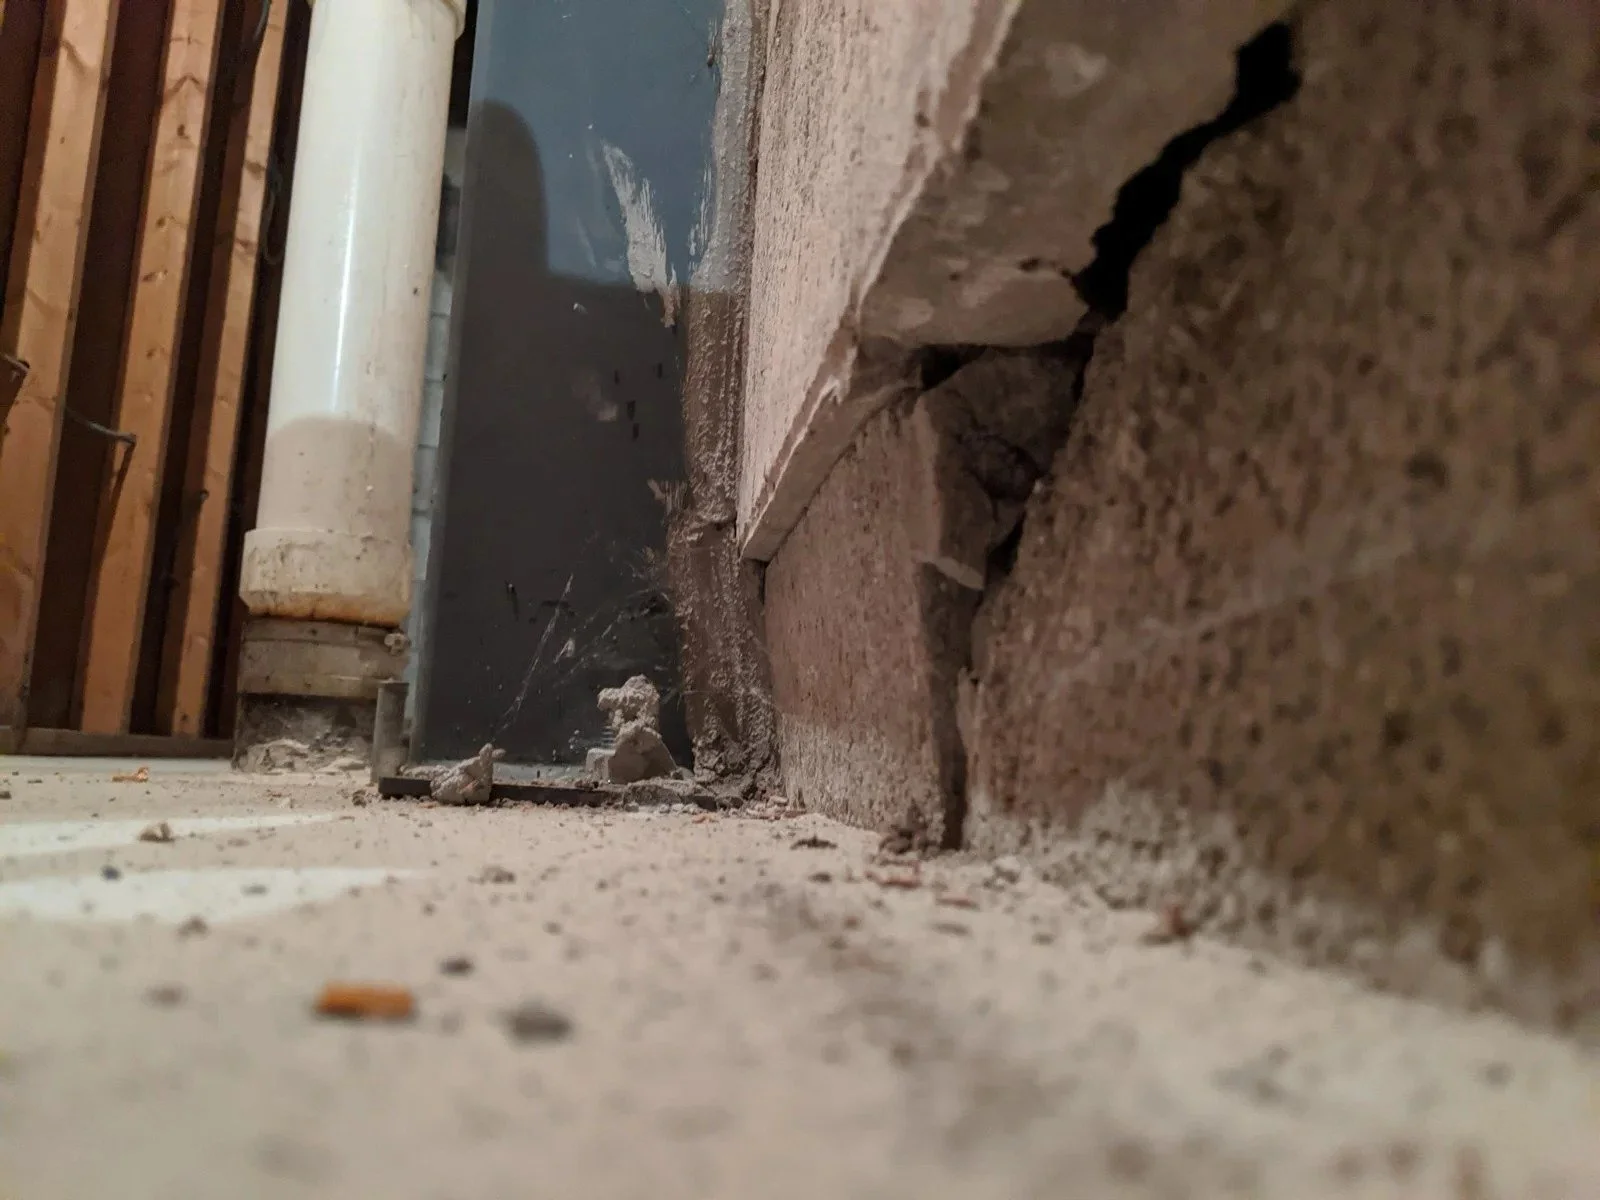
- Face shell of the block cracked, bulged, or missing
- Fresh debris on the floor at the base of the wall
- Shear or displacement between the braces, not just at them
- Seepage exactly at the sheared joint
- Recent-looking braces or tuckpointing next to fresh damage
The timing question
Old Movement, or Active Movement?
This is the question the buyer actually cares about, and the standard gives you a useful line: a prior repair with no new cracking after ten years is considered stable. Short of that, the crack edges tell you most of what you need.
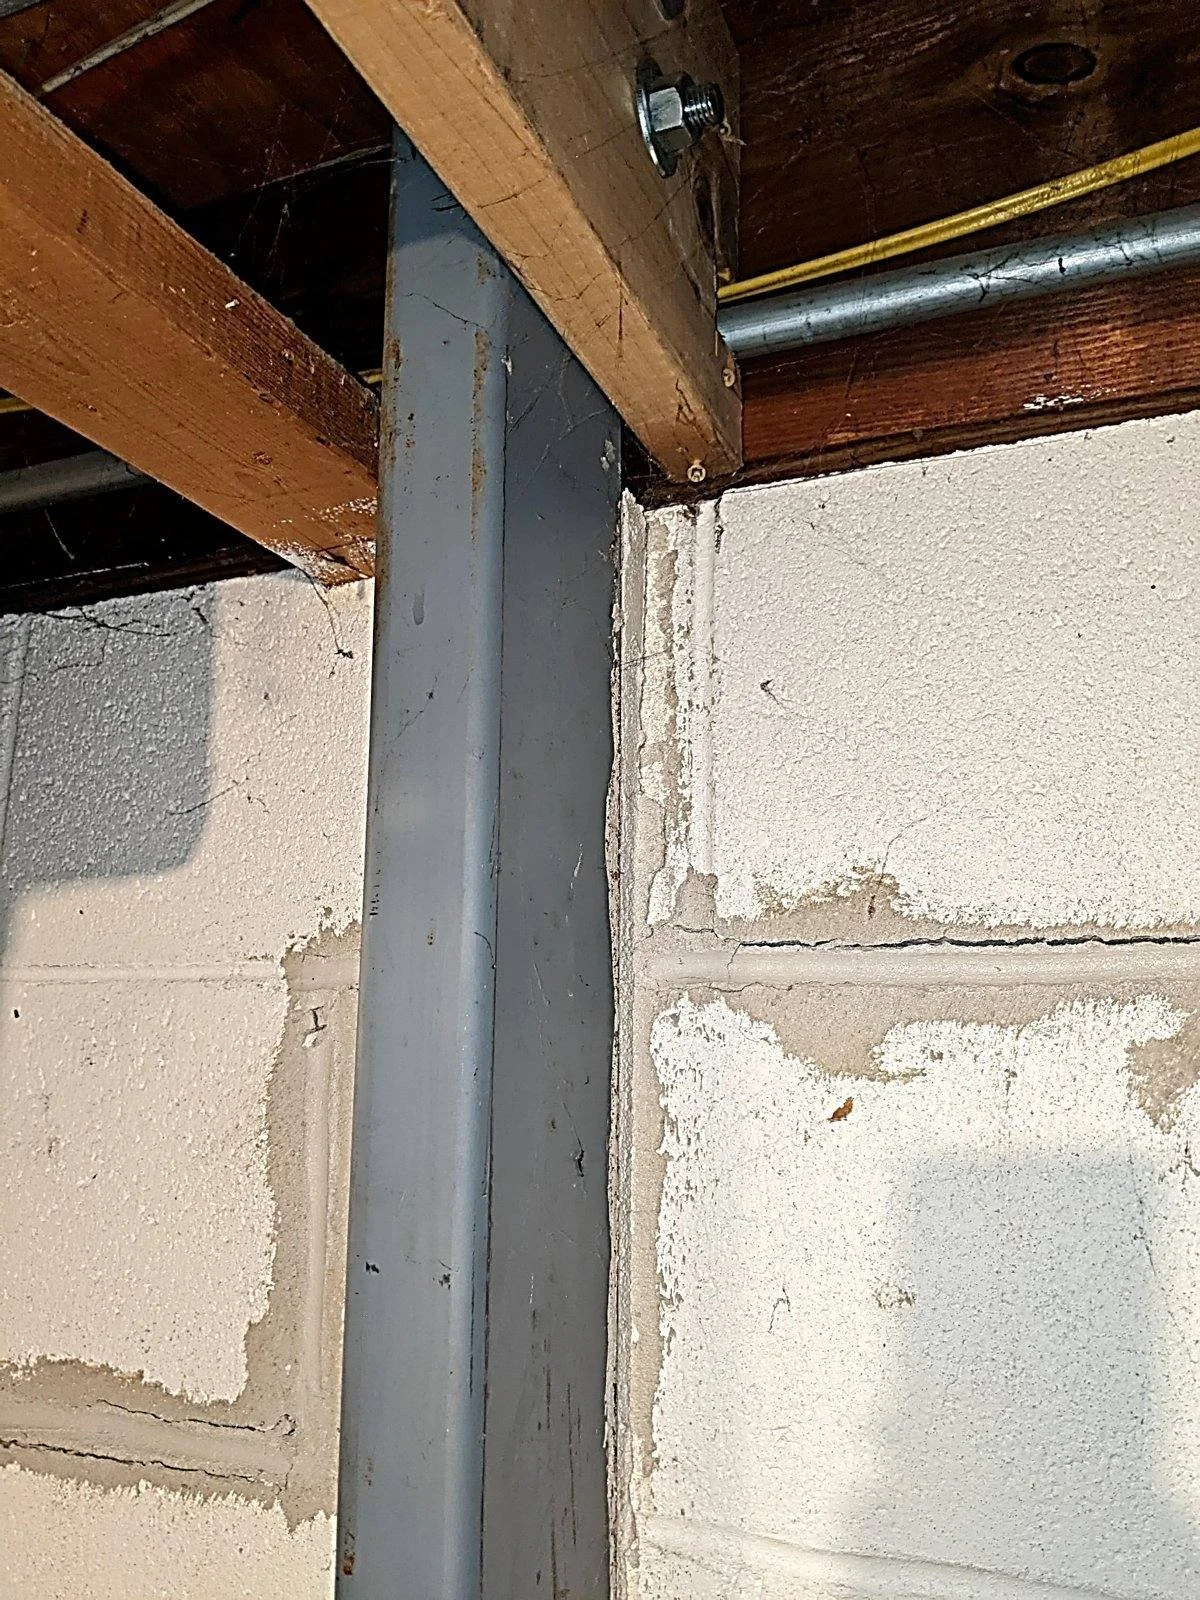
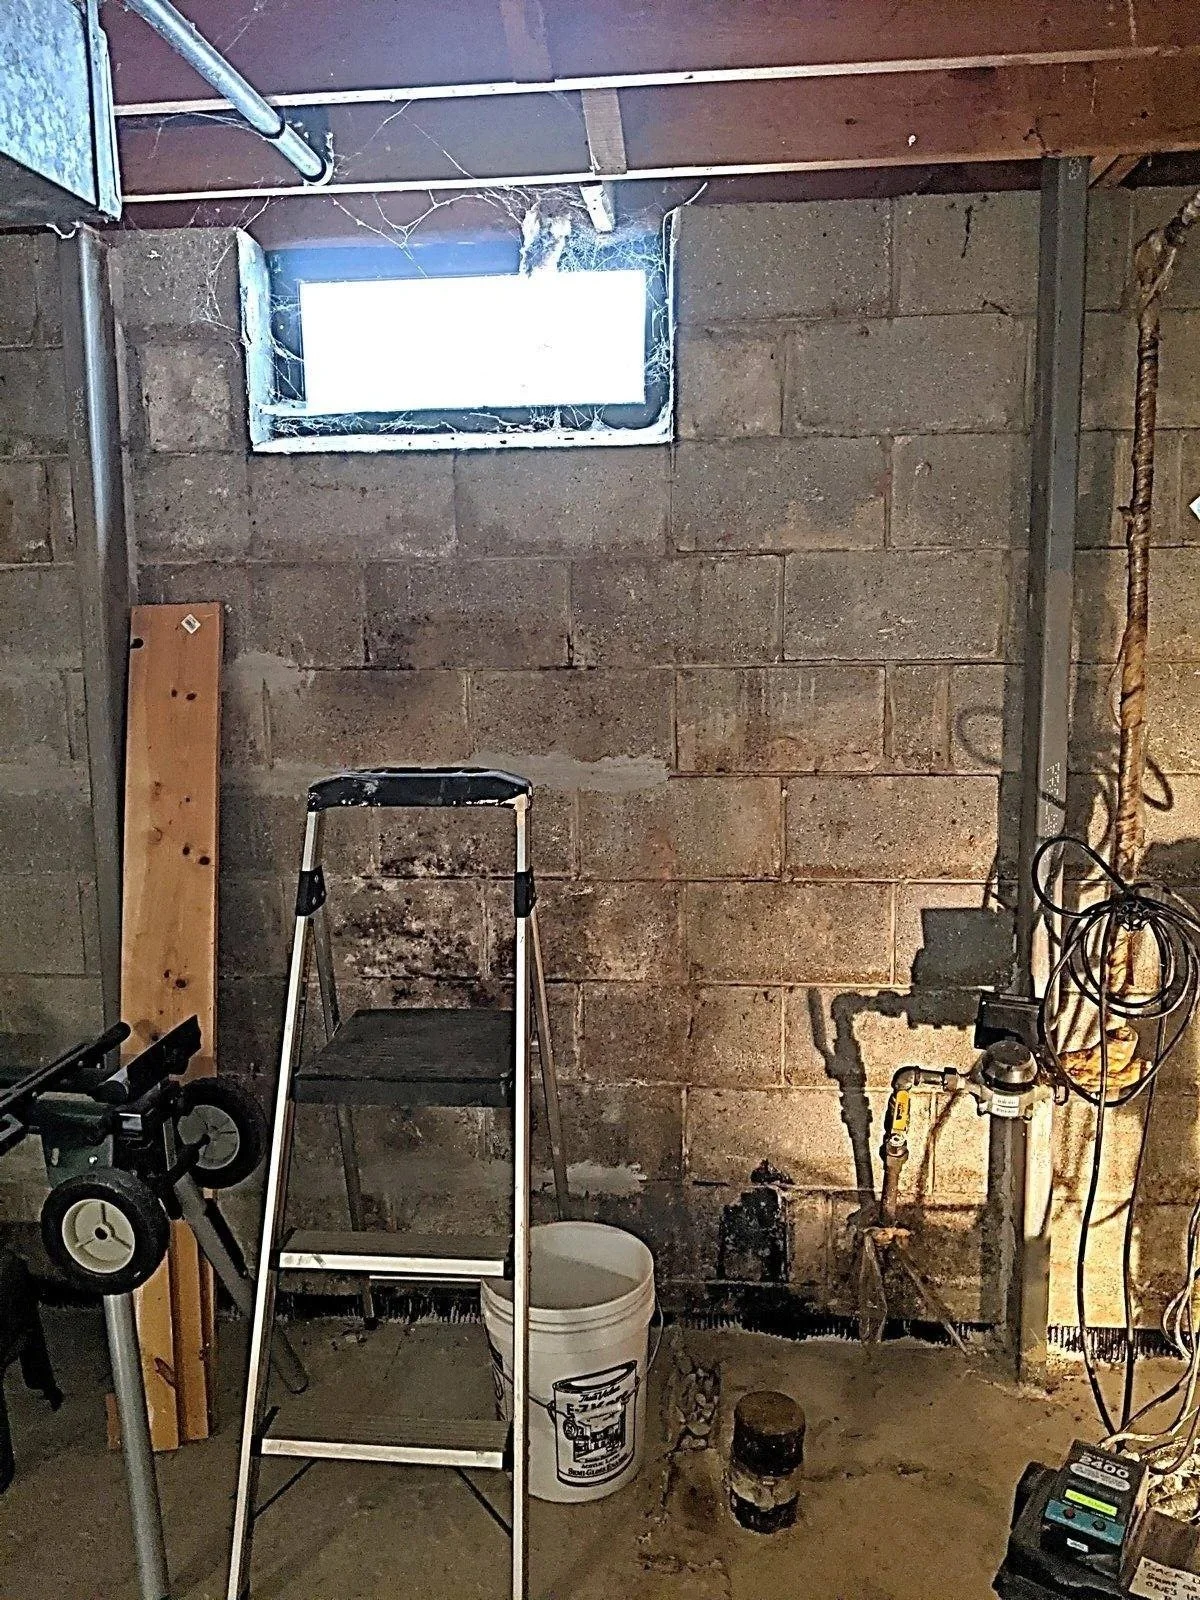
- Crack edges: clean and sharp (new) versus dusty, painted over, or filled (old)
- Tuckpointed or patched joints that have re-cracked — active
- Paint that bridges the crack unbroken — stable since it was painted
- Evidence of repair ten or more years old with no new cracks — the standard treats this as no defect
- Dated photos, work orders, old inspection reports — ask for them
- Owner reports a seasonal change in crack width — active
Existing repairs
What to Record on Bracing You Find
A braced wall is not automatically a fixed wall. Record what is there and whether it is performing, and leave the adequacy determination to whoever is licensed to make it.
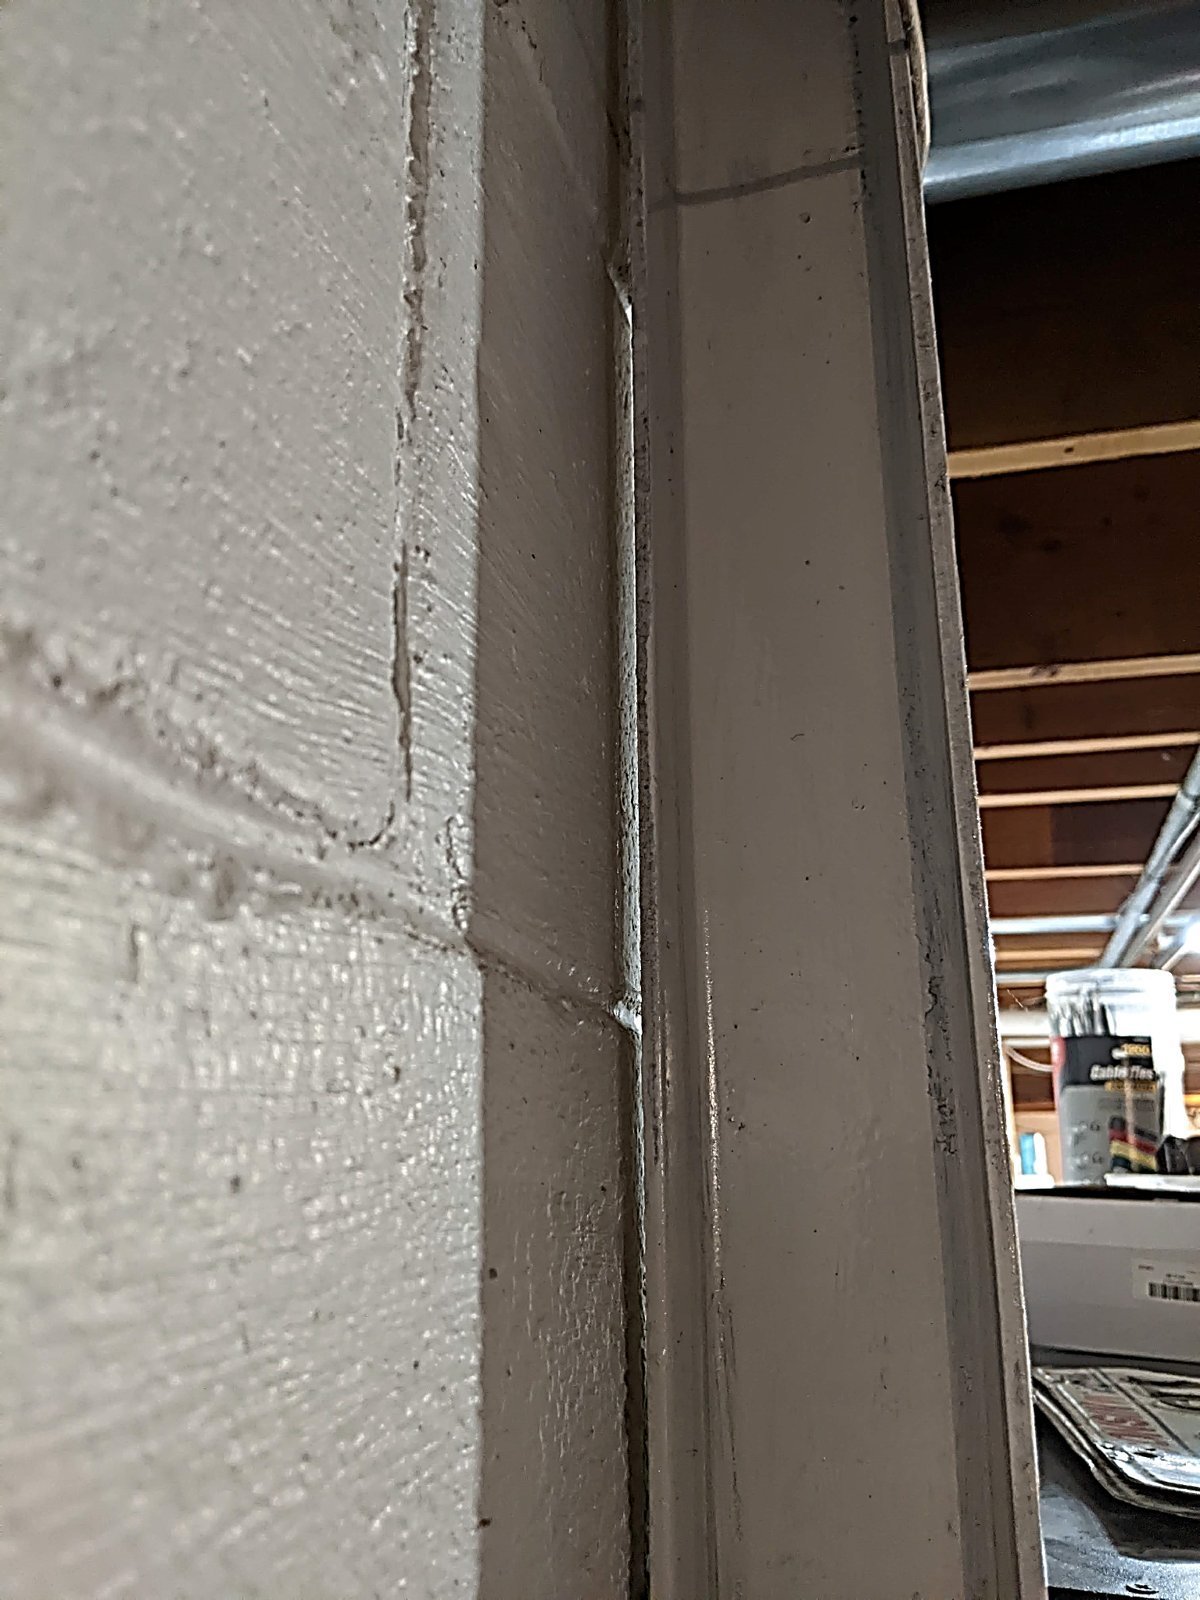
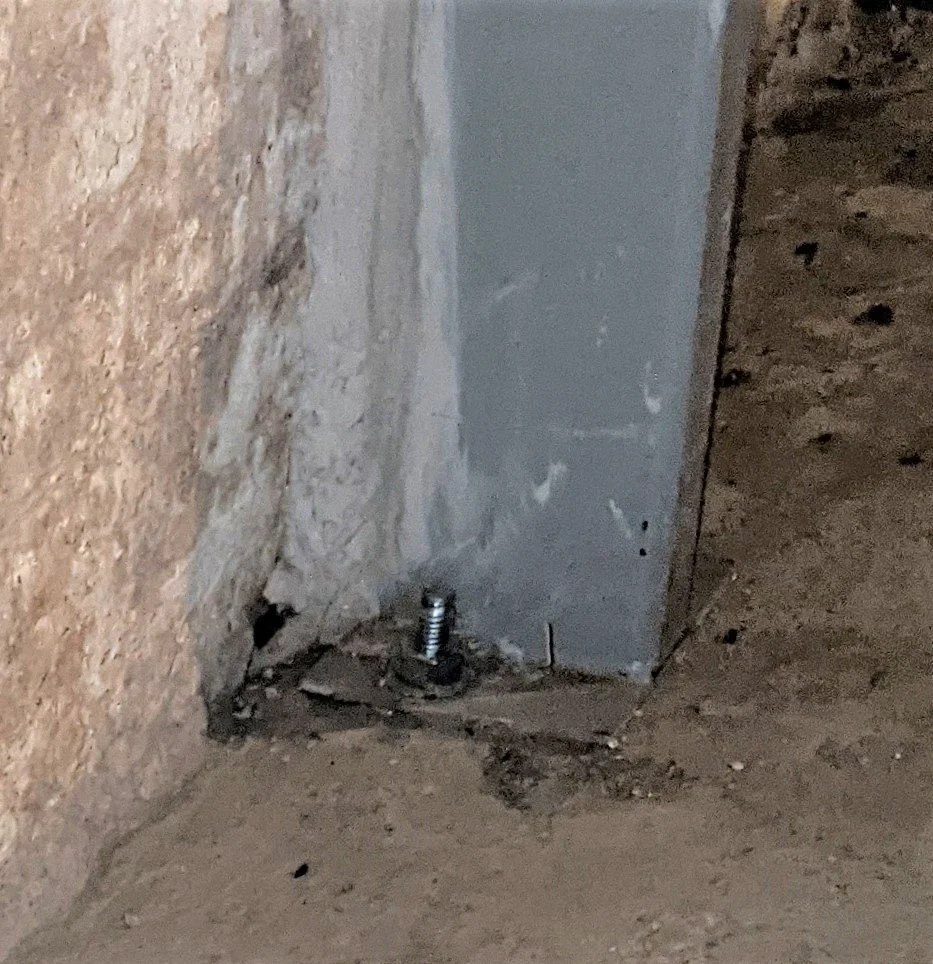
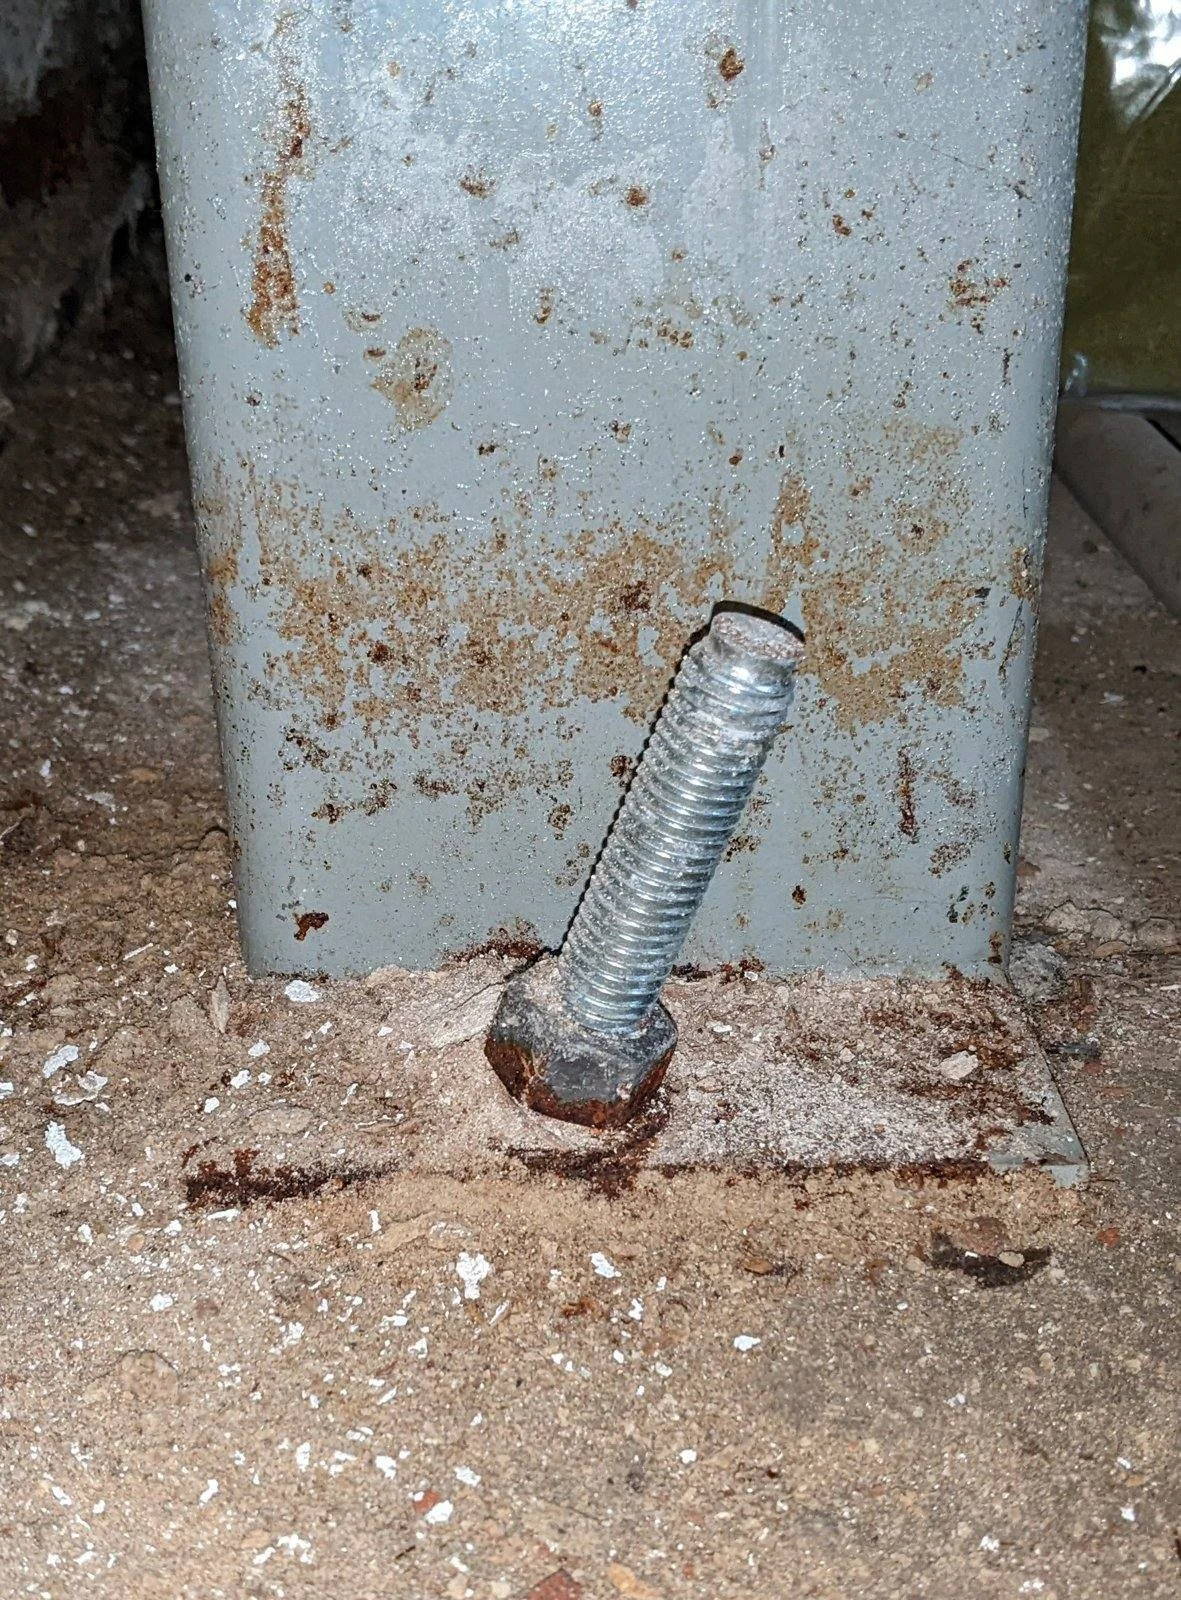
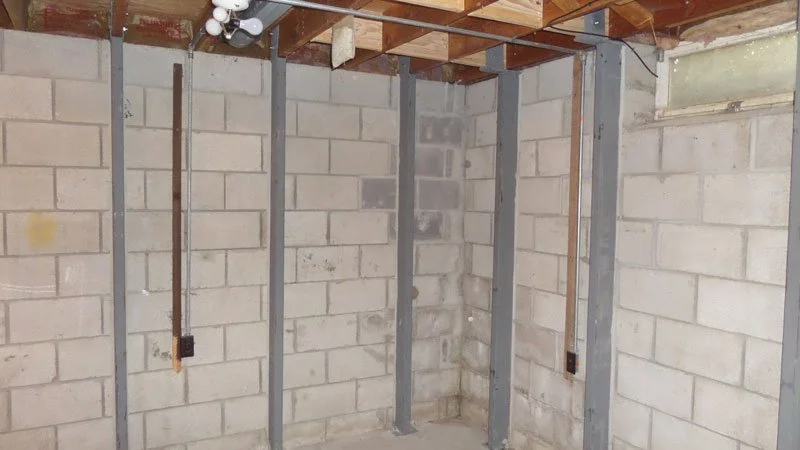
- Type: steel tubes, I-beams, 2x braces, carbon fiber straps, wall anchors with plates, core filling, pilasters. The only WAFRP or WI UBC code-compliant braces without site-specific engineering are steel tubes.
- Spacing — pace it off — and whether the brace is grouted tight behind
- Top connection to the joists; bottom anchor into the footing or slab; blocking where joists run parallel
- Approximate age; any permit sticker or contractor tag
- New work: does the seller have the permit and an engineer’s letter? Wisconsin requires design for 90 pcf, and many national products are not evaluated for it.
- Wall moved between the braces
- Slab cracked around the base plates; anchors loose or twisted
- A gap opened behind the brace
- Tuckpointing only — the standard is explicit that tuckpointing is not reinforcing
- Braces on a wall that is actually settling — covered in part four
- Aged reinforcing with signs of active movement
Spacing
Braces Too Far Apart Are Not a Repair
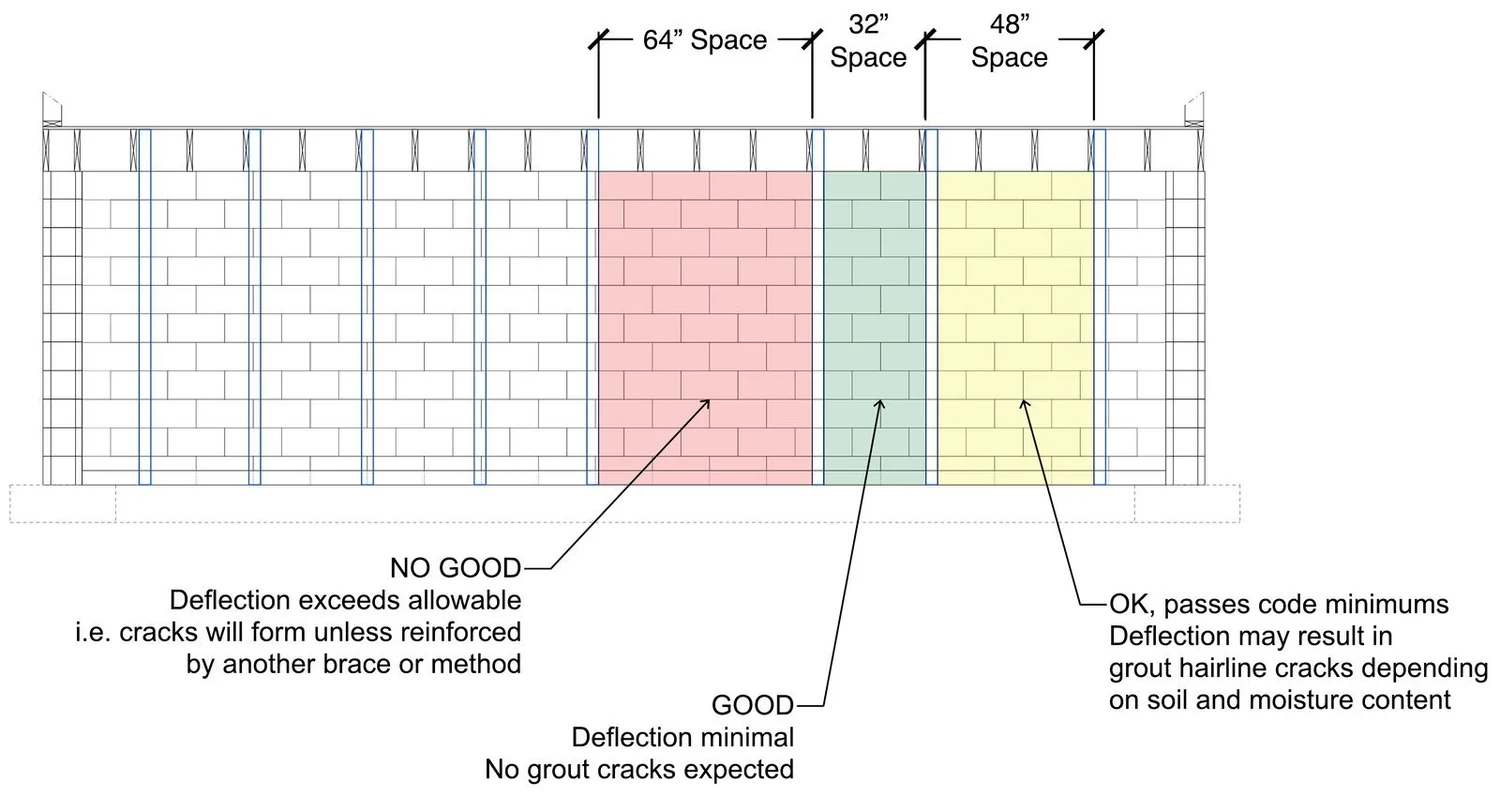
- Pace the spacing — the standard’s tables run 36 in. to 50 in. maximum depending on steel size
- Brick walls: 36 in. maximum
- Wide gaps at windows, beam pockets, or obstructions
- New cracks between the braces — under-braced
Poured walls
Different Cracks, Same Questions
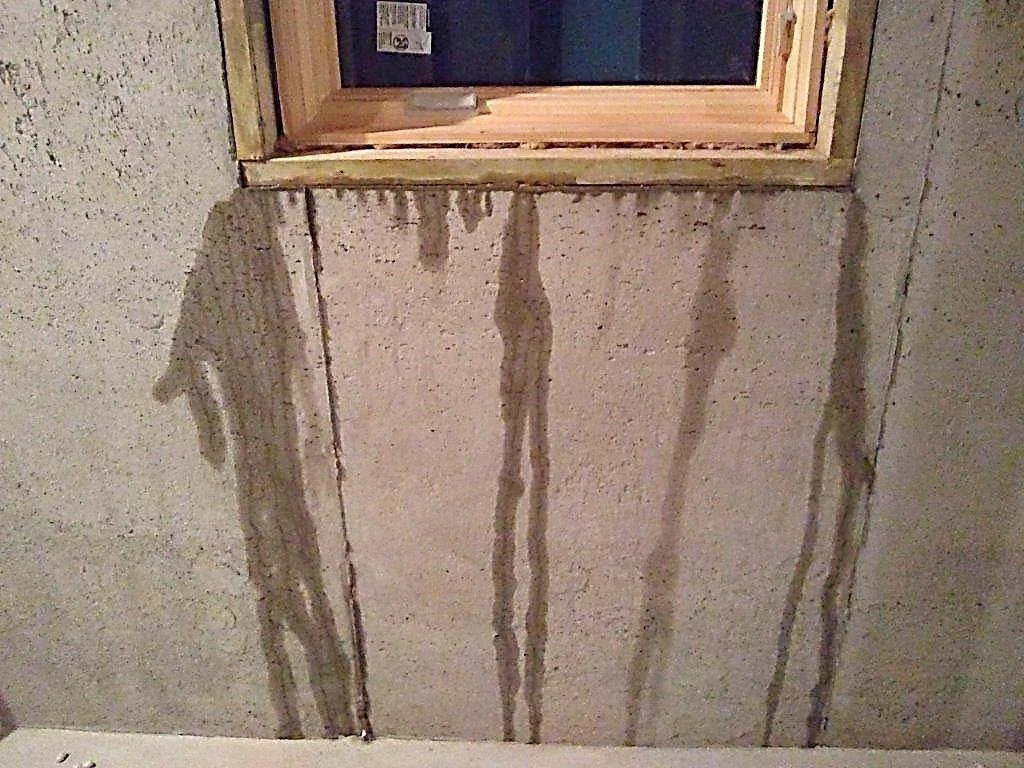
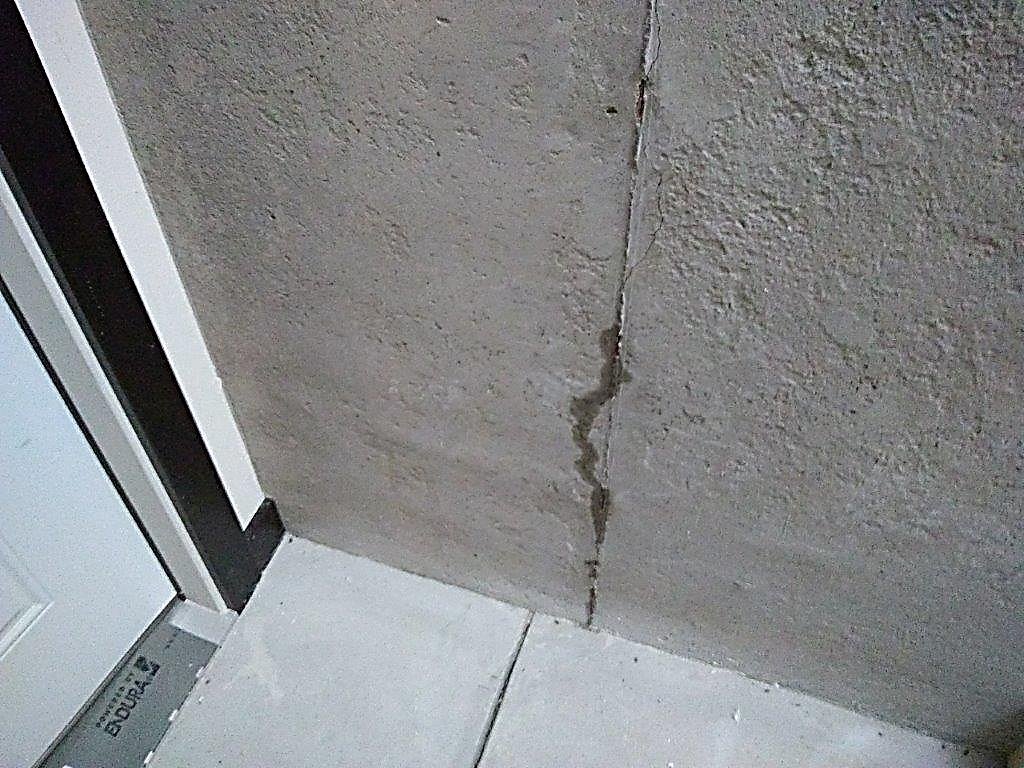
- Vertical, near-uniform-width cracks — shrinkage; note whether it is wet
- Diagonal cracks, or an offset across a vertical crack — leaning
- Horizontal crack — bowing; rarer, since poured walls usually tip
- Top of the wall displaced inward relative to the sill
- Tie-rod holes and cold joints that seep
- Prior injection ports or surface-applied epoxy — was it structural, or a water stop?
A vertical shrinkage crack in a poured wall is common and usually not structural. The same crack with an offset across it is a leaning wall. The difference is one pass with a straightedge.
- Reading Foundation Cracks: A Field Cheat Sheet
- Basement Moisture: Three Entry Zones
- Lateral Wall Movement: Bowing, Tipping and Shearing — you are here
- Settlement and Deterioration: What Braces Cannot Fix
- Measuring, Documenting and Reporting What You Found
Bow or lean with no signs of active movement can be documented for future monitoring. Bow or lean with signs of active movement, base shear in any amount, and block face failure all warrant evaluation by a foundation contractor, consultant, or licensed engineer. The measurement thresholds behind those calls are in part five.
VM Engineering LTD. We provide the plan. We do not do the repair. Contact us.
References: WI UBC Chapter VI, 30.50 Foundation Repair & Damp Proofing (WAFRP Best Management Standards) · R. L. Handy, The Day the House Fell, ASCE Press.